
DIY to Professional Painter in 8 easy steps
DIY to Professional Painter in 8 Easy Steps
By Mac’s Custom Haus — Preserving History, One Restoration at a Time
If you’ve ever looked at a freshly restored classic or a perfectly refinished modern car and wondered, “How do professionals get paint that slick?” — this guide is for you.
At Mac’s Custom Haus, we take vehicles from raw metal to glass-smooth, show-ready finishes every day. Whether you’re a DIY painter stepping up your game or simply curious about the professional process, here’s the exact 8-step blueprint we use to transform vehicles with industry-level quality.
1. Take the Vehicle to Bare Metal (Rust Repair Included)
Everything starts with a clean foundation. Stripping the vehicle down to bare metal removes old paint, fillers, contaminants, and hidden damage.
If rust is present, this is where the repair happens — cutting out cancer, welding in fresh metal, and ensuring the surface is structurally sound.
A flawless paint job can only sit on a flawless foundation.
2. Acid Etch the Vehicle
Bare metal begins to oxidize almost immediately. Acid etch creates a chemical bond with the metal, killing surface contamination and improving adhesion.
This step ensures your epoxy primer grabs the metal correctly and prevents corrosion from creeping in down the road.
3. Epoxy Prime & Begin Bodywork
Epoxy primer is the barrier coat that seals your metal and creates a stable base for bodywork.
At Mac’s Custom Haus, we always perform bodywork above epoxy — never on raw metal — to avoid moisture issues and ensure long-term durability.
This is where dents, waves, and imperfections start to disappear.
4. Epoxy Prime Over Bodywork (Lock In Repairs)
Once the bodywork is shaped, we epoxy prime again.
This “lock-in” coat seals all repairs, prevents moisture absorption, and prepares the vehicle for a perfectly uniform surface before high build.
Think of it as adding armor over everything you just corrected.
5. High Build Primer Application
High build primer is the thick primer that allows us to refine the shape of the panels.
This step builds up enough surface for blocking, leveling, and achieving that perfectly straight look that separates DIY paint jobs from professional ones.
6. Block Sanding (180–320 Grit) + 400 Wet Sand
This is where true craftsmanship shows.
We block the car until every panel is flat, true, and wave-free.
Starting with 180–320 dry creates the shape, and 400 wet sanding refines it into a paint-ready surface.
This step takes time — but it’s the soul of a show-quality job.
7. Epoxy Sealer, Basecoat, and Clearcoat
Before color, we apply an epoxy sealer for maximum adhesion and uniform color holdout.
Then comes your selected basecoat and a high-gloss clearcoat to protect the finish and bring your color to life.
This is the moment the whole vision starts to pop.
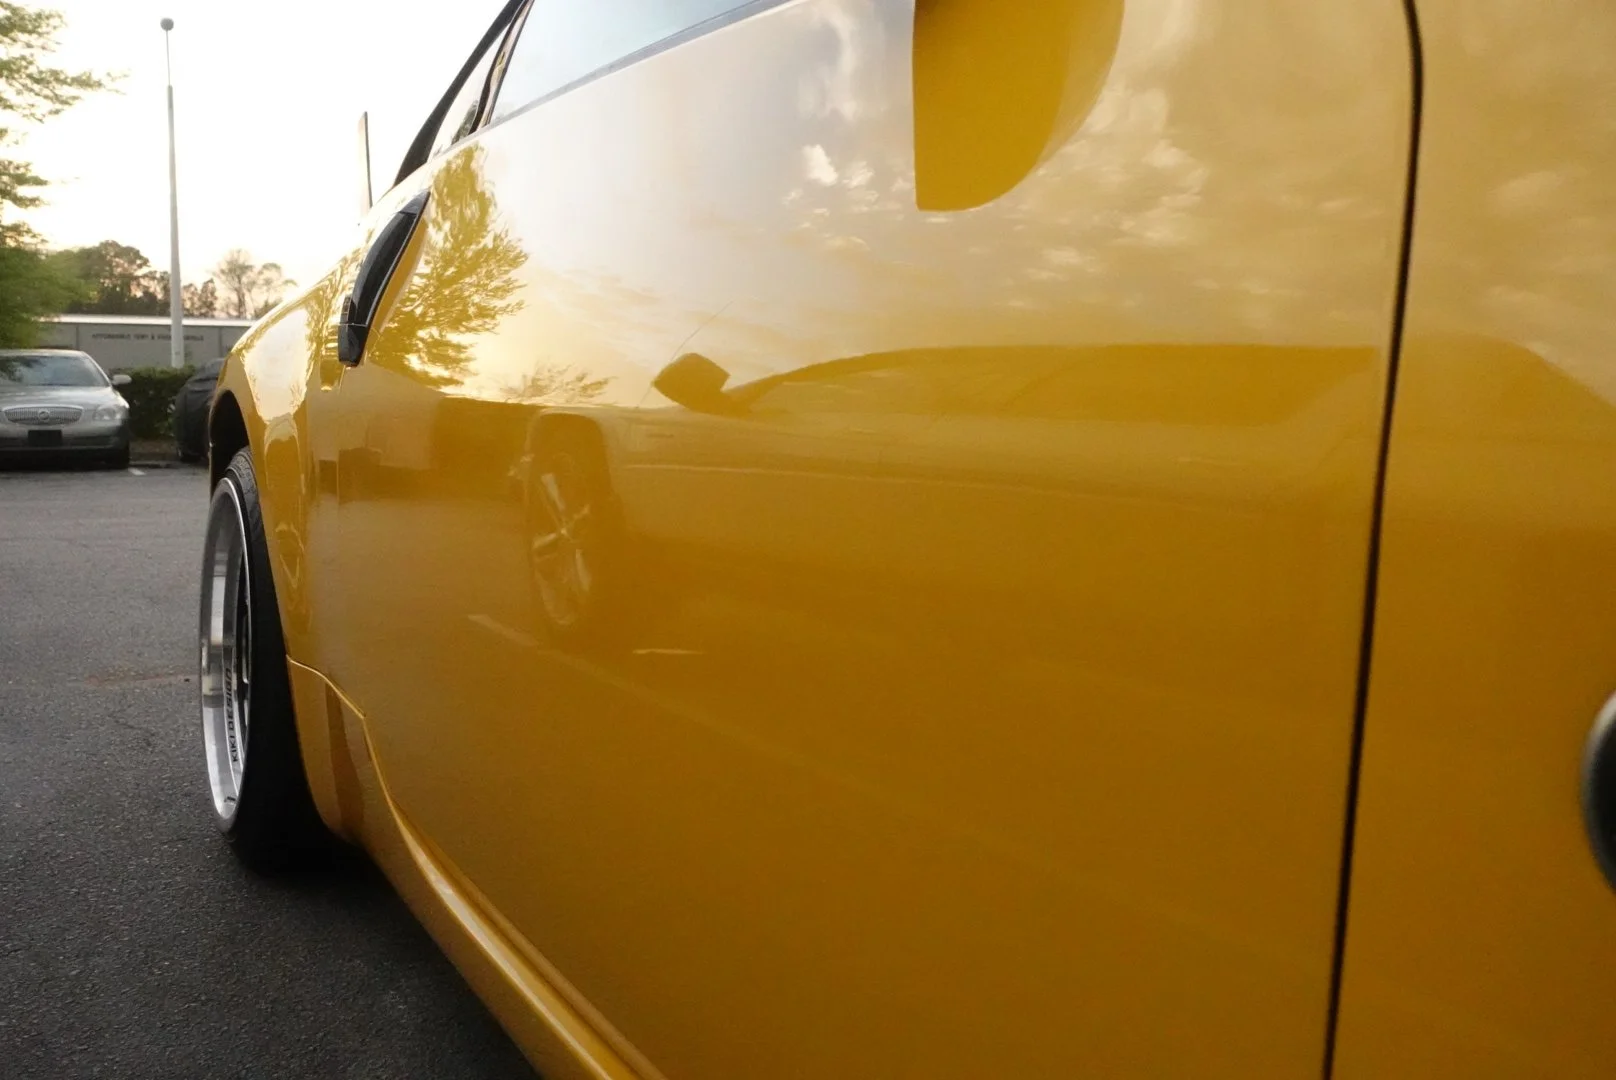
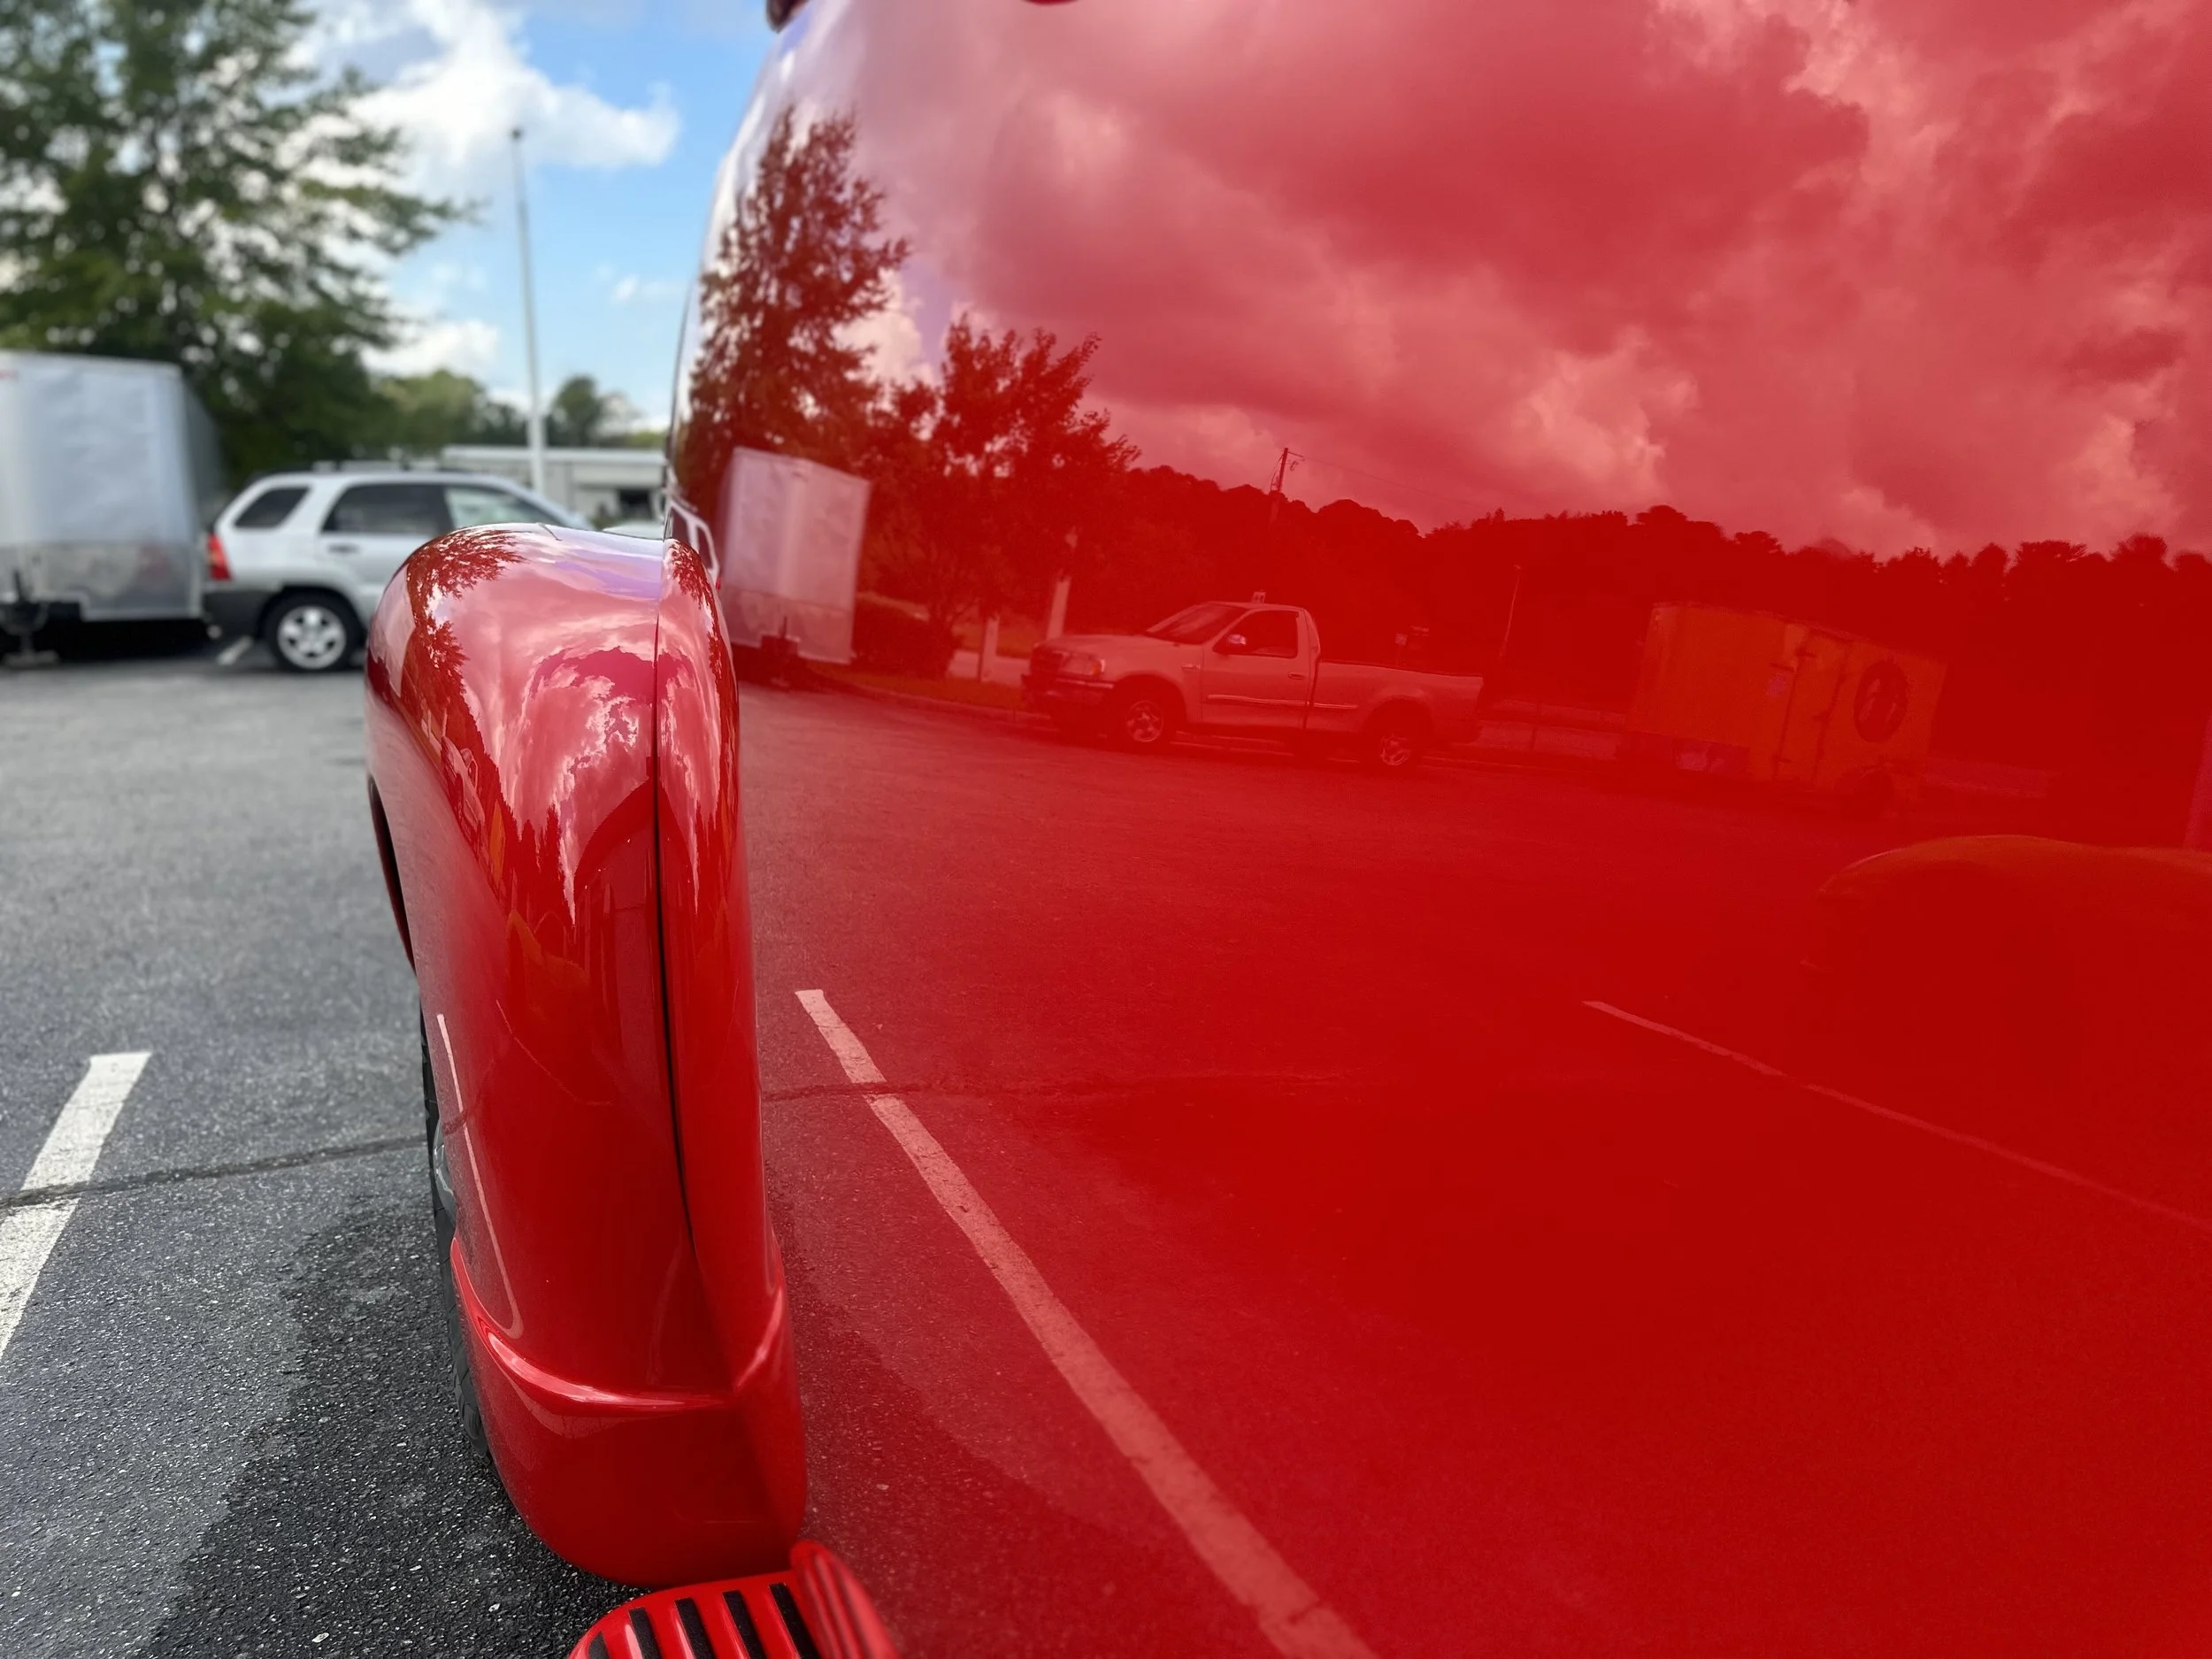
8. Wet Sand & Buff to Perfection
Even the best clearcoat has a bit of texture.
Wet sanding levels the surface, and buffing brings out a deep, mirror-like shine.
This final polish is what gives that “fresh out of SEMA” look — the kind of reflection you can shave in.
Ready to Go From DIY to Professional?
Whether you’re repainting a daily driver or restoring a piece of automotive history, following these eight steps will dramatically elevate your results.
At Mac’s Custom Haus, this process is our standard — the reason our finishes stay beautiful for years and why customers from all over trust us with their vehicles.
If you ever need help, want a consultation, or are ready to bring your build to the professionals, we’re here to preserve your vehicle’s story, one restoration at a time.
Mac’s Custom Haus
Automotive Restoration • Paint • Bodywork
Virginia Beach, VA
what is “excellent”, when talking about automotive paint?
It all begins with an idea.
When I started Mac’s Custom Haus in late 2020, I didn’t know what an excellent paint job was, and like many of us, I thought I knew what a bad paint job was, but I didn’t.
As a sponge for automotive refinishing information, I learned that a bad paint job can look like a good one because most people judge a good paint job by how slick the clear coat is laid or how uniform the color is from panel to panel. However, a good paint job preserves the car’s structure and the materials used to protect the finish. With a bit of experience, someone can make crap look great on pickup day, but a few months to a year later, you see why you wasted your hard-earned $2000.
If you pay attention to cars as I do, you may see the occasional failing clear coat on your neighbor's 12-year-old Honda Civic or flaking paint on your Aunt’s Hyundai Sonata, and maybe say to yourself, “man, that looks bad.” However, bad paint goes a little deeper than that. That, my friend, is more along the lines of failing paint, a byproduct of poor preparation, low-quality materials, and potentially poor paint application, which can result in a bad paint job. However, it isn’t the primary indicator that constitutes a bad paint job.
A bad paint job results from cutting corners.
There are steps required for an excellent paint job, and at Mac’s Custom Haus, we have learned what that means through ongoing research to ensure we follow manufacturer-recommended steps. We determine that, as industry leaders, we must fail forward and, because we don’t know it all, we rely on our mentors for guidance.
We also understand that the customer may not always know the process that constitutes excellence in this field, so we learn, apply, and test our results by following up with past customers to see how our process has held up. We have not had a complaint.
At Mac’s Custom Haus, we stand behind products from SPI, PPG, Glasurit, and Sherwin-Williams.
If you have any questions, do not hesitate to reach out to Mac’s Custom Haus VA.